
Managing Your Team
Invite teammates, assign roles, and keep your organization's access clean — all from one page.
When new reps join — or someone changes roles — you need to grant the right access in seconds, not file a ticket. The "Team Management" page lets you invite teammates, promote or demote admins, and track every outstanding invitation from one place.
This is the hands-on companion to Roles & Permissions, which explains what each role can do. Here, you'll learn how to actually make the changes. You'll need an Admin role to see this page.
Where It Lives
In the web app at app.tenali.ai, open Admin → Team in the sidebar to reach the Team Management page. It has two tabs:
- Users — everyone currently in your organization, with their name, email, role, and meeting count.
- Invitations — everyone you've invited but who hasn't fully joined yet, with each invite's status.
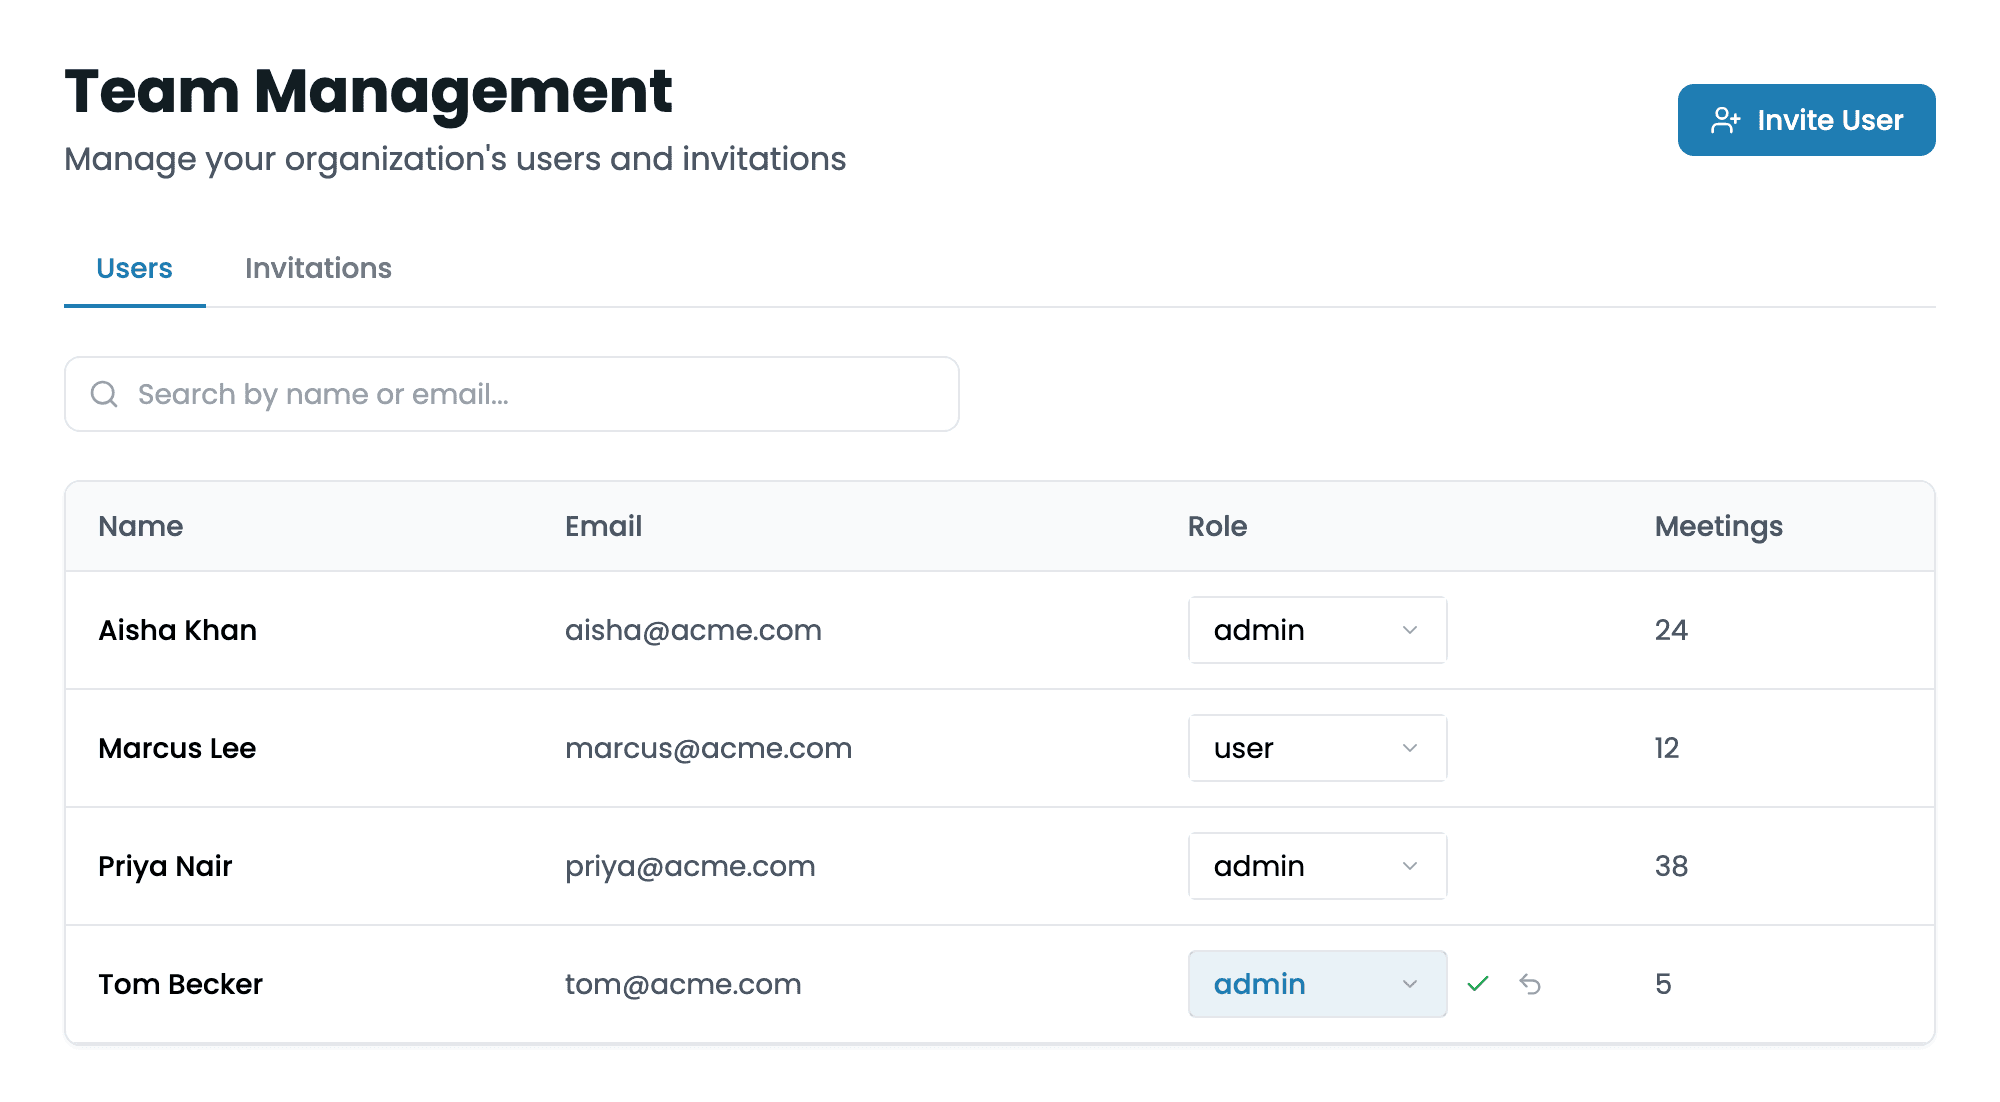
Team Management page
Admin → Team showing the Users and Invitations tabs, with the Invite User button top-right.
Inviting a Teammate
Adding someone is a 30-second flow. Use the Users search box (Search by name or email) first if you're not sure whether they're already in the org.
- 1
Open the invite dialog
Click Invite User in the top-right corner of the Team Management page.
- 2
Enter their email
Type the teammate's work email into the Email field.
- 3
Pick a role
Use the Role dropdown to choose User (standard access) or Admin (team and organization management). Grant
Adminonly to people who need to manage members, integrations, and settings. - 4
Send it
Click Send Invitation. You'll see a success toast — "Invite sent" — confirming the invitation went to that address. Your teammate receives an email invite to join.
Changing a Role or Making Someone an Admin
Roles are changed inline, right in the Users table — no separate screen. Promote a power user to Admin when they take on team-management duties, and demote back to User when they don't need it anymore.
- 1
Find the person
On the Users tab, locate the teammate (search by name or email if your list is long).
- 2
Open the role control
In their Role column, click the role control. It expands to let you switch between User and Admin — the two assignable roles.
- 3
Pick the new role
Select the role you want. The control highlights to show you have an unsaved change.
- 4
Save or undo
Click the green checkmark to save the change, or the undo arrow to cancel and revert. Saving takes effect immediately.
Tracking Invitations
The Invitations tab is your audit trail for access requests. Each row shows the invitee's Email, Role, Status, when it was Sent, and when it Expires.
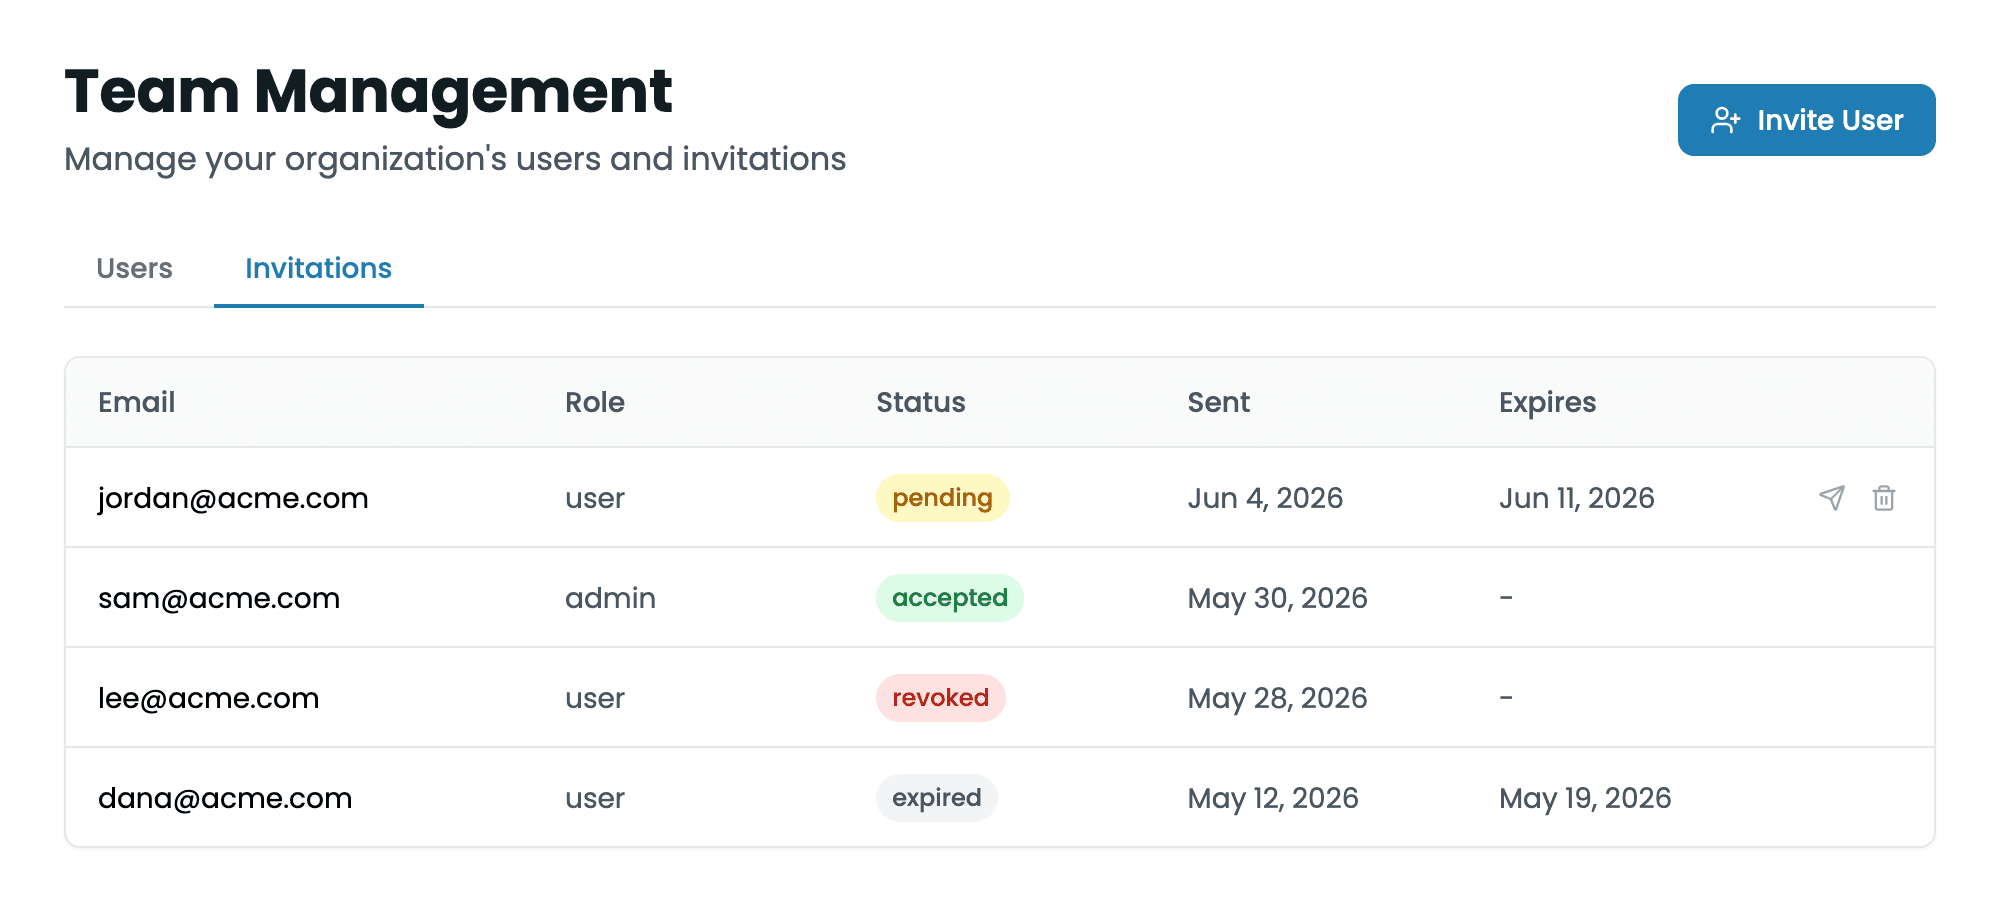
Invitations tab
Each invite's email, role, status (pending, accepted, revoked, expired), and sent/expiry dates — with Resend and Revoke actions on pending invites.
Statuses tell you exactly where each invite stands:
- pending (yellow) — sent, not yet accepted.
- accepted (green) — the teammate joined; they now appear in the Users tab.
- revoked (red) — you cancelled the invite before it was accepted.
- expired (gray) — the invite lapsed without being accepted.
For any pending invitation, two actions appear at the end of the row:
- Resend — sends the invitation email again, useful when it was missed or buried.
- Revoke — cancels the invitation so the link can no longer be used.
Next Guides
- Roles & Permissions — what each role can and can't do
- Admin Overview — the full set of organization controls
Was this page helpful?