
Managing Sources, Refresh, and Storage Limits
Keep sources healthy with refresh, delete, ownership controls, and storage quota monitoring.
Source management determines answer quality over time. Treat it like ongoing data hygiene.
Source Status
Every row carries a status pill, and it's the first thing to check when a source isn't being used in answers:
| Status | What it means |
|---|---|
| PENDING | Queued. Not answerable yet. |
| IN PROGRESS | Being read and indexed. Not answerable yet. |
| COMPLETED | Ready. Tenali will use it in answers. |
| FAILED | Couldn't be processed. The reason is shown directly under the row. |
| DELETE PENDING | Removal in progress. |
A FAILED source is the most common cause of "why doesn't Tenali know this?" — the file or page was never read, so nothing about it is answerable. Read the reason, fix the cause, and refresh.
Source Actions
Each row has a ⋮ menu at the end:
- Refresh — re-read the source after the underlying content changed. Tenali doesn't re-crawl or re-read on its own.
- Delete — remove a stale or incorrect source. Its content stops being used in answers.
- Share with workspace / Make personal (admins) — flip an existing source's visibility in either direction, without re-uploading it.
Search and filter narrow the list by source type and name.
Ownership & Visibility
A source is either personal to the person who added it, or shared with the workspace.
- Personal sources answer only that person's questions — and that holds even if they're an admin.
- Workspace sources answer for everyone, and are the only ones Tenali will use when it's answering in a Slack channel.
- Admins can change an existing source's visibility from the row's ⋮ menu, in both directions. Promoting a personal source makes it answerable team-wide; making a shared source personal takes it back out of team answers.
In admin mode, the list also shows who added each source.
Storage limits
Your sources share a storage allowance, and you can see exactly where you stand without leaving the page. At the top of the Sources sidebar, a storage card shows how much you've used against your plan's limit — for example "4.2 MB / 20 MB".
Just below the numbers is a usage bar that fills as you add sources, and its color tells you how close you are to the limit at a glance:
- Green — under 50% used. Plenty of room.
- Yellow — 50% to 80% used. Start thinking about cleanup.
- Red — 80% or more used. You're near the limit.
A line under the bar shows the exact percentage consumed across all sources, so you always know where you stand.
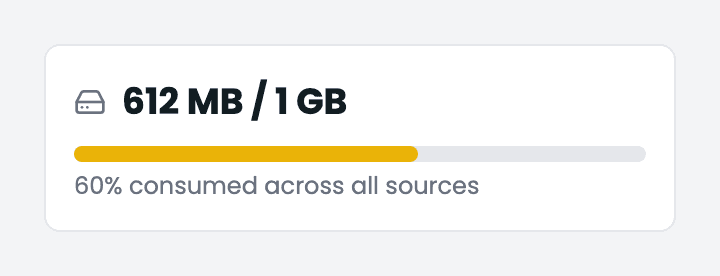
Sources sidebar storage card
The storage usage card with the used / limit total and the color-coded usage bar.
When you reach the limit
Once usage hits 80% or more, an "Upgrade" link appears next to the percentage in the storage card. Use it to move to a plan with more room before you run out. Keeping usage in the green also protects answer quality — there's space to add the docs that matter most.
If your plan includes unlimited storage, the card simply shows your total used with an "Unlimited storage" label and no usage bar — there's nothing to monitor.
How to upgrade
The "Upgrade" link in the storage card opens your Billing settings, where you can move to a plan with a larger storage allowance.
- 1
Open the storage card
Go to the Sources page and find the storage card at the top of the left sidebar.
- 2
Click Upgrade
When you're at 80% or more, select the "Upgrade" link next to your usage percentage.
- 3
Choose a plan
You'll land on the Billing tab in your profile settings, where you can pick a plan with more storage.
Next Guides
Was this page helpful?
Import Gong Calls
Pull your existing Gong call recordings into Tenali so they become searchable and start teaching Tenali how to answer the questions your buyers actually ask.
Integrations
Connect your CRM, meeting recordings, and knowledge sources from one place so Tenali answers from everything your team already uses.